Wednesday 30 September 2020

Toledo Campaign – Day 4


12 March 1813 – Southern Spain - Day 4

Giron orders his army to concentrate between Albareal and Toledo

He sends 1st corps to support 3rd corps at Albareal


Suchet orders 16th corps to move to Bargas and abandon Mocejon

This is to protect 7th corps as they try to rally and regroup

He also orders 15th corps to attack Albareal

This is to distract the Spanish from the weak French centre

End of Move 9

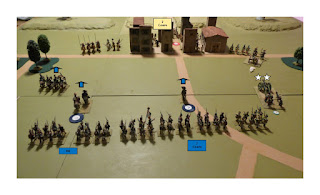
Albareal should have been an easy French victory

It is held by a weak 3rd Spanish corps, who have run out of supplies

They are reduced to two infantry brigades and corps artillery

There is also a militia brigade in garrison in the town

And a guerrilla brigade resting in a nearby village


The Poles are not aware that there is a full strength Spanish corps approaching

Despite this they launch an all out attack on the weak 3rd Spanish corps

Their cavalry charge the gunners, but are routed with 20% casualties

The gunners then concentrate on the approaching infantry, and rout one brigade

The Polish infantry press on and rout the two Spanish infantry brigades


At move 9 (out of 12 moves) they spot 1st Spanish corps arriving

Without cavalry support, and with one brigade in rout, the Poles halt

It is clear that they could not reach the town before 1st Spanish corps

And to do so they would have to abandon their broken infantry and cavalry

This would allow the guerrilla brigade behind them to attack the routed troops


A second defeat for Suchet and the whole campaign looks in danger of collapse

After four days and four battles his army must now halt, resupply and regroup


The Spanish army is not much better off

3rd corps has already run out of supplies

They will lose 400 infantry or 100 cavalry or gunners each day until they resupply

The other three corps are down to one days supply


Each French corps can carry a maximum of four days supplies

The Spanish corps can only carry three days supplies

So the Spanish need to halt and resupply more often than the French

Sunday 27 September 2020

Toledo Campaign – Day 3

5 March 1813 – Southern Spain - Day 3

With his flanks secured by the battles of Torrijos and Mocejon, Suchet leads the main French attack down the main Madrid to Seville road.   The town of Bargas commands this road.  It is held by a militia brigade and supported by the full strength 2nd Spanish corps.


Suchet has 7th French corps, plus two infantry brigades from the army reserve.   He outnumbers the Spanish in infantry, and is confident of an easy victory

End of Move 4

Suchet moves forward with six infantry brigades in the centre, cavalry on the left and artillery on the right.  


His gunners advance with confidence to deploy within short range of the Spanish artillery.   They are unpleasantly surprised when the Spanish open fire and hit them at long range, and again as they unlimber at short range.   The French gunners pass their morale test, but will now be minus two each time they fire.


Meanwhile the dragoons advance on the French left.  They are pleased when the Spanish guerrilla cavalry move forward to meet them.

End of Move 10

The French dragoons on the left flank have an easy victory against the guerrilla lancers.  The supporting Spanish infantry move back in square, leaving the dragoons helpless to exploit their victory.


The French gunners continue to fire at short range, but with minus 2 calculating hits they cause no casualties.


So the French infantry must attack unsupported.


On the left Suchet leads two conscript brigades against the left halt of the town.   The Spanish garrison is also a conscript brigade, but have the advantage of hard cover.  And though outnumbered two to one they hold on.   One French brigade is routed with 20% casualties, and the second withdraw disordered with 10% casualties.


In the centre the French have more success.   They rout the militia garrison with 30% casualties.  The French receive 10% on each brigade.


Meanwhile the Spanish gunners continue to fire on the right of the French line.   Two brigades are sent to engage the gunners and the infantry brigade supporting them.   Once more the Spanish gunners do great damage.  They halt the leading brigade with their first volley, and then pound them until they rout with 30% casualties.


The second French brigade engaged the supporting Spanish infantry.  But both are conscript and the Spanish held their ground.   When the leading brigade broke and routed, the second brigade had to test their morale.  They failed and joined the rout.   The gunners, who had already suffered 20% casualties, now also had to test their morale because of the rout.  They also failed and joined the rout.


By nightfall three of the six French infantry brigades were in rout, plus the artillery.

Only one brigade, and the cavalry, were still formed.   Suchet ordered a retreat to rally, regroup and consider his options.


This was a real setback for the French invasion of Andalusia.   It was the first time that the French had lost a set piece battle with the Spanish.   And it was particularly unexpected because the Spanish has less infantry than the French.


This comes on top of the heavy French casualties at Mocejon.   It is not a very promising start to the French invasion.

Wednesday 23 September 2020

Toledo Campaign – Day 2


10 March 2013

Whilst 13th Polish corps occupied Torrijos, 16th Italian corps attacked Mocejon.

3rd Spanish corps routed from Torrijos routed towards Albareal

The Spanish garrison of Torrijos because the first guerrilla band

Battle of Mocejon – Move 12

The Italians were always going to win the battle of Mocejon

The town was held by a weak corps of only three brigades and artillery

The Italians had a full corps of four brigades of infantry, cavalry and artillery

They were also reinforced by an infantry brigade from the reserve

This brigade was to garrison Mocejon after the town was taken.


The Italians had more open space to deploy than the Poles at Torrijos

They deployed their cavalry on the left, to pin the Spanish artillery

Their own artillery was in the centre, and all of the infantry on their right

With no Spanish cavalry their gunners did not need infantry support.


The Italian artillery moved into close range of the walled town

They came under fire from the Spanish artillery, and lost 10% casualties

Despite this they continued to bombard the right section of the town


As the infantry neared the town the cavalry advanced to charge the Spanish guns

They received 10% casualties, which caused them to halt in disorder

Before they could withdraw the Spanish artillery fired again.

The cavalry lost another 10% casualties and withdrew in disorder


Meanwhile two infantry brigades closed with the two Spanish brigades outside the town.   Both Spanish brigades were low quality conscripts, but so also was one of the Italian brigades.   The melee went on for two phases, with the Spanish running away with 30% casualities on each brigade.  However the Italians also lost 10% on each brigade.


The military holding the right side of Mocejon had already received 20% casualties from the artillery.  The remaining two Italian brigades were sent to attack the town, with the attached infantry brigade in reserve.   Once more it took two phases for the attackers to force their way in.  The military were routed with a total of 40% casualties, but the two Italian brigades also received 10% casualties each.


As Italian commander I had made a serious mistake in planning the attack.   I knew the walled town would be difficult to take, and I wanted all of the infantry to be available for the attack.   All five brigades were on the right, leaving only the cavalry to take care of the Spanish gunners.  I was confident that the full strength hussar brigade could do so.


So it was a bit of a shock when they had to withdraw with 20% casualties just as the infantry attack went in.   The Spanish gunners received no casualties, and were now able to fire on the infantry as they started their attack.   It would take too long to send the reserve infantry brigade to attack the gunners, and it was very likely they would also be repulsed with heavy casualties.   By now the hussars had rallied, so they were sent in for a second attempt to take the guns.   The Spanish gunners fire again, and caused another 10% casualties.  The hussars routed with 30% casualties.


By now it was nightfall.   The Italians had broken into the right hand section of the town.   Three Spanish brigades were in rout.   But the fourth brigade still held half of the town.   And their artillery was full strength.   Despite this they would not be able to withstand a further day of fighting, so they withdrew under cover of darkness.


The Italians had taken the town, but at a great cost.   They suffered 2000 casualties to the 4000 Spanish casualties.  But they were spread over all six Italian brigades.   The artillery and each infantry brigade has 10% casualties.  The cavalry 30% casualties.   All of the Spanish casualties were spread between three infantry brigades.


Given time all of the Spanish casualties, less 10% per brigade, would be replaced.   However the Italians would only receive 20% of their cavalry casualties.   The rest would remain.  


All brigades of 16th Italian corps would be weakened for the remainder of the campaign.   Half of their infantry started the campaign no better than the Spanish conscripts.  They would now be weaker than a full strength Spanish brigade.   Their gunners would also be less effective.  


It was a serious, and unexpected, setback so early in the campaign.

Sunday 20 September 2020

Toledo Campaign – Day 1


9 March 2013

Marshal Suchet moves south to open his Seville campaign.

Toledo is the gateway to Andalusia, and his first objective

He opens the campaign with an attack on Torrijos

By doing so he hopes to lure the Spanish to support their left flank

This would allow him to advance down the main road in the centre

Battle of Torrijos – Move 4

To reach Torrijos the Poles have to move through the mountains.

As they near the town they send their lancer brigade to the left hand valley

This is to prevent the Spanish gunners concentrating on the valley exit


Just about everything which could go wrong for the Spanish did so


The town was held by a militia brigade, supported by one of the two weak Spanish corps.   They only have three infantry brigades and corps artillery, no cavalry at all.  The Vistula have four infantry and one cavalry brigade, plus corps artillery.  They also had a brigade from the reserve who would form the garrison of Torrijos when they took the town.


The Spanish gunners fired on the enemy infantry six times, but failed to hit once

By contrast the Polish gunners fired three times and hit each time

First the infantry on the left of the town supporting the gunners

The first time the Polish artillery fired they hit the square, which broke and ran

The second and third time they hit the left hand garrison, who were shaken


The Polish cavalry then charged the Spanish gunners

They hit the cavalry, but could not stop them


Four Polish infantry brigades attacked just before nightfall

On the left they stormed the town and routed the shaken garrison

In the centre they were held to a draw by the military brigade in garrison

On the right two brigades charged and routed the remaining Spanish brigade


The Poles lost 2 infantry and 1 cavalry (900 casualties)

The Spanish lost 8 infantry and 2 gunners (3400 casualties)


Unfortunately a very historical outcome.   The Spanish were broken and routed with heavy casualties.  The Poles won with minimum casualties.


This was not the rules, it was down to a very unfortunate run of bad dice for the Spanish player (Jan).   When this happens it is very tempting to either ignore a couple of critical results, or to play the whole wargame again.   But we always resist the temptation to do so.   No matter how disappointing the outcome, there would be no point in the campaign if we did not abide with the outcome.


In Spanish campaign games the French almost always win the opening battles.   It is only when they advance and experience attrition problems from the guerrilla that things become difficult for them.  


Also all battle casualties, less 10% per brigade, will be replaced eventually.   The three Polish casualties were spread between two infantry and the cavalry brigades.  Just 10% each, so none will be replaced.


The Spanish heavier casualties per brigade, 4 on one and 3 a second.   5 of those casualties will be replaced, leaving each brigade with just 10% each.   So again time is with the Spanish.


It is just hard to remember all of that when you keep rolling 1 or 2, when you need at least 4 or 5.

Wednesday 16 September 2020

A Spanish Adventure


Map of Spain 

Spain was always going to be the second phase of the new campaign.   With three campaign areas in Germany, and two in Spain, it makes sense to alternate each campaign phase.   This not only allows different uniforms and terrain, but also a different style of wargaming. 

In Germany there are three campaign areas, each of three regions.   The left hand one is always the French reserve area, and the right hand one the allied.   This covers the whole of Germany

In Spain it is more complicated.   The French did not have a secure reserve area.   All of Spain was hostile to them, they only controlled the area which they currently occupied.   It would be essential to have this reflected in the campaign.

For my first attempt I divided Spain into eight regional areas.   This was three in the north, three in the centre and two in the south.   But given the area covered by Portugal it would share a border with three of those regions.   The British had to have their lines of supply running from either Lisbon or Oporto.   So they would have to deploy in the north or centre

In my campaign the Spanish have always been in the south.  This is because for most of the Peninsular War the French occupied almost all of Spain.   The Spanish command and control had to abandon Madrid and move to the southern town of Cadiz.

This was OK when there was no grand strategic element to the campaign.   But I would now need Wellington to be affected by what happened to the Spanish field army.  

It was pretty late in the day when I came to fully appreciate this.   By then I had made the new maps for Spain and even published them on here and in the Campaign Diary Blog.

New Regions of Spain

The new Spain would have six regions, as shown above.   Wellington would operate in the north, and Giron in the south.   This would mean that the centre regions, the active region in the campaign, would be Madrid to the north coast, and Madrid to the south coast.   This was the area most used in the previous campaign.

It does mean that the Lisbon region would be in the Spanish campaign area.   This was not ideal, but could not be avoided.   I would also have the option of spreading the Spanish area from Seville to Valencia

The northern campaign area was a better fit for Wellington.  It would include Oporto, an acceptable alternative main supply base.   The main campaign area would include the familiar names of Talavera, Burgos, Vittoria and San Sebastian.

Fortunately the French did not have a secure rear area in Spain.   Because neither Barcellona nor Valencia regions would fit that bill.   Instead they would operate from Madrid and Burgos.   And the critical city of Madrid was on the border between Wellington and Giron.

I am very pleased with this compromise.  But I do wish I had thought of it before I created all of the new campaign maps, many of which then had to be altered.

Sunday 13 September 2020

Cavalry v Artillery Rules


One of the few disadvantages of frequent wargaming, particularly with the same rules, is that you soon get a feel for what works, and what doesn’t. 

Jan and I wargame most days, if only for a few hours.  And as we have used the same orders of battle and campaign system to produce our wargames, they produce similar wargames and therefore solutions.

I have long felt that once you master a set of rules, whether commercial of self written, you tend to play to the rules rather than historical tactics.   The “better” the rules, the less important this becomes.   By “better” I mean the more your chosen rules produce the type of result you want to achieve.   This is, of course, very subjective and almost unique to each wargamer.   We all like to believe that we are recreating history on our wargames table, but of course this would be an impossible objective.

The best we can hope for is that our games will give us similar tactical problems to a commander in our chosen period, and hopefully will “feel” and “look” right at the same time.   Again very subjective and I would never suggest that I have achieved anything other than my personal prejudices.

Recently I have become disillusioned with the outcome of our cavalry v artillery melee.   Rather strange that it should have taken so long to become obvious.   Our “house rules” are about 12 years old, though they have had numerous amendments.

Regular readers will know that we favour simple rules, strongly influenced by the element of chance represented by the dice.   This is because Jan and I only wargame together, and both very familiar with the rules.   So the strong element of chance adds the required uncertain outcome to each wargame.

 Over the past month or so I have become aware that cavalry charging artillery have a very strong chance of winning the melee.   The rules are balanced and make allowance for better troops, casualties and whether the artillery have fired last move.  So it may just be that my cavalry have had a run of good dice over the past dozen or so wargames.

Whatever the reason I have rewritten the rules.   The sequence is now very simple.

Artillery get to fire on the cavalry at long range.   They require 9 using 2D6, plus or minus the usual modifiers.   The chances of a hit are low.

When the cavalry charge the artillery fire at short range.  This requires 5 using the same table.   The changes are very good.

The cavalry test morale, but not our regular morale test.  They roll 1D6, with usual modifiers.   

3 or more they charge home and the gunners rout with 20% casualties.

2 cavalry halt shaken

1 cavalry rout

It seems to be working well, though it is very early days

Wednesday 9 September 2020

End of Brunswick Campaign


Battles fought during Brunswick Campaign

This was the first campaign fought during the reorganisation of the campaign to include a higher level of command.   It was never intended to change this element of the campaign.   The campaign at army level, and the battles fought as wargames, has always worked well.  In fact it was important that the new higher level of command did not affect this satisfactory part of the campaign.

There were five battles during this campaign.   Napoleon won three, Blucher won two.    All of the subsequent wargames worked well, and were enjoyable.   They were not in anyway affected by the new level, even the campaign and wargames maps look the same.

But in the background there was a lot going on.

It is too early to say whether the new level of command is working or not
Brunswick Regional Map

This is the where the new level of command comes in.

This campaign took place in the centre of the nine squares.   Each square on this map is a wargames table.  

The previous system was simple.   At the end of this campaign I would put a coloured star on the map of Northern Germany.  This was to indicate which side won, and would show a record of who won each campaign phase.   However I would pick the location of the next phase at random.   Usually because that particular town had not been used before.

The new system makes this an extra dimension of the campaign.    Corps are placed on this map to show where they were at the end of the previous campaign phase. They would be limited to one corps per square.   This means each corps occupied a wargames table size area.   Each army will occupy one of the nine districts of the region.   I must now decide how I am going to carry on this layer of command to produce the next campaign phase in Northern Germany.

Ideally I would eventually use all nine districts as campaign phases.  But I will have to create a narrative which makes sense of it all.

In this particular campaign it has worked out well.   The Prussians have retreated behind the river Elbe, a logical move for a defeated army.   The next logical move would be for Napoleon to attack Magdeburg in the next campaign phase.   But if the Prussians are defeated again they will retreat off the map.   I will have done a lot of work to produce just two campaign phases.
I will have to give some thought about how to create this new grand strategic aspect of the campaign.   Perhaps it will involve some liaison between the Prussian, Russian and Austrian armies.   So that a victory in one theatre will have an effect on the other two.

Sunday 6 September 2020

Day Eight – A French Victory?


8 March 1813 – North Germany - Day 8

Blucher won the battle of Cremlingen, but it was a hollow victory.

He delayed the French attack, he did not defeat it.
Without cavalry, he had to keep his infantry behind the crest of the hill
His artillery were on the forward slope, and did damage to the advancing French.
But in doing so they also suffered heavy casualties.

1st Prussian corps arrived during the night
But they were low on supplies and had serious battle casualties
So they were placed in reserve behind the battle line

Three of the four Prussian cavalry brigades had 30% casualties or more
They could not deploy and would need reinforcements before they could do so
Without cavalry he could not pursue the French

Napoleon had not retreated.  
He rallied his three corps at Brunswick, their start positions for the battle
All three corps were weak, but all were operational
His cavalry had minor battle casualties and could provide a security screen
But they were in urgent need of resupply.
3rd corps, who lost the battle of Weyhausen, was ordered to join them
They were out of supply, and would suffer attrition casualties
But to avoid retreat he had to concentrate all four corps at Brunswick.

Both armies had fought themselves to a standstill
It would take many days to reorganise and resupply them

Napoleon achieved the campaign objective, he took and held Brunswick
He did not crush the Prussian army, but he did fight it to a standstill

Wednesday 2 September 2020

Day Seven – Battle of Cremlingen


 March 1813 – North Germany - Day 7
Napoleon’s defeat at Weyhausen presented him with a difficult decision.
He had won three of the four battles so far in this campaign
The Prussians had retreated to Cremlingen to make a final stand
It was a strong defensive position, but they had the river Elbe at their backs

Both armies were low on supplies and in urgent need of battle casualty replacements
It was worse for the French, who had advanced beyond their lines of supply

Both commanders had three corps available to fight
The French were stronger in cavalry, and they had the almost untouched Guard
Blucher had more infantry, and could hide them behind a long ridge

Much more important was 1st Prussian corps, who had won the battle of Weyhausen
They were marching south to join Blucher, and would arrive within 24 hours

So Napoleon must either attack and hope to crush Blucher before nightfall
Or halt at Brunswick and try to rally 3rd corps, who had lost at Weyhausen

Being Napoleon it was an easy decision – he would attack
Move 9 – end of battle
Blucher occupied two hills, where he could deploy his infantry out of sight
His artillery were on the forward slope, and could fire on the French
But he had to plug a gap between the hills and an isolated fortified farm

Napoleon was stuck with the campaign deployment of his army
To delay one day to redeploy them would allow 1st Prussian corps to arrive
The Guard were on his left flank, faced with one of the two occupied hills
4th corps in the centre had a similar problem, but were much weaker than the Guard
13th corps on the right were also weak, but faced the vulnerable gap

13th corps would have to make the main attack.
To support them Napoleon established a grand battery with guns from 4th and 13th corps.

The attack went well, and the artillery broke the infantry between the hill and the farm
But Blucher brought up three reserve brigades from the town and plugged  the gap

It was all down to the Guard.   They were almost full strength.  
One infantry brigade, and the cavalry, each had 10% casualties.
Their artillery moved into close range of the Prussian guns, but could not move them
The Prussian gunners concentrated on the approaching infantry
The infantry advanced with four brigades, two in front and two behind
The cavalry were behind the infantry and artillery
Just as they were about to attack the front right hand brigade was hit
They failed their morale and were shaken
The left hand brigade advanced up the hill
But the reserve infantry and cavalry could not get past the stalled brigade

The leading brigade was 1st Grenadiers, the only A class brigade
They faced a B class Prussian brigade
Because the Prussians were behind the crest they had to test their morale
They passed and stood to meet the French attack

Despite everything the French should have won this melee.
But the god of dice were against them
The first round of melee was a draw, 10% casualties on each side
They lost the second round, another 10% casualties and shaken
They then failed their morale, broke and ran
The stalled brigade beside them tested, and also failed, and also ran
Two brigades behind them stood their ground, but were disordered
The cavalry finally moved around the stalled infantry
They approached the artillery, suffered another 10% casualties, failed morale
The Prussian artillery poured fire at close range into the disordered mass

Napoleon ordered the Guard to retreat.

A great wargame.   I always like commanding the Imperial Garde. 
Even with small 8 figure brigades they look impressive advancing in column
But sometimes it is more enjoyable to lose than to win
This was a real “waterloo moment”, and for me proved the value of our rules.

It may be the end of the campaign, but what a way to end.