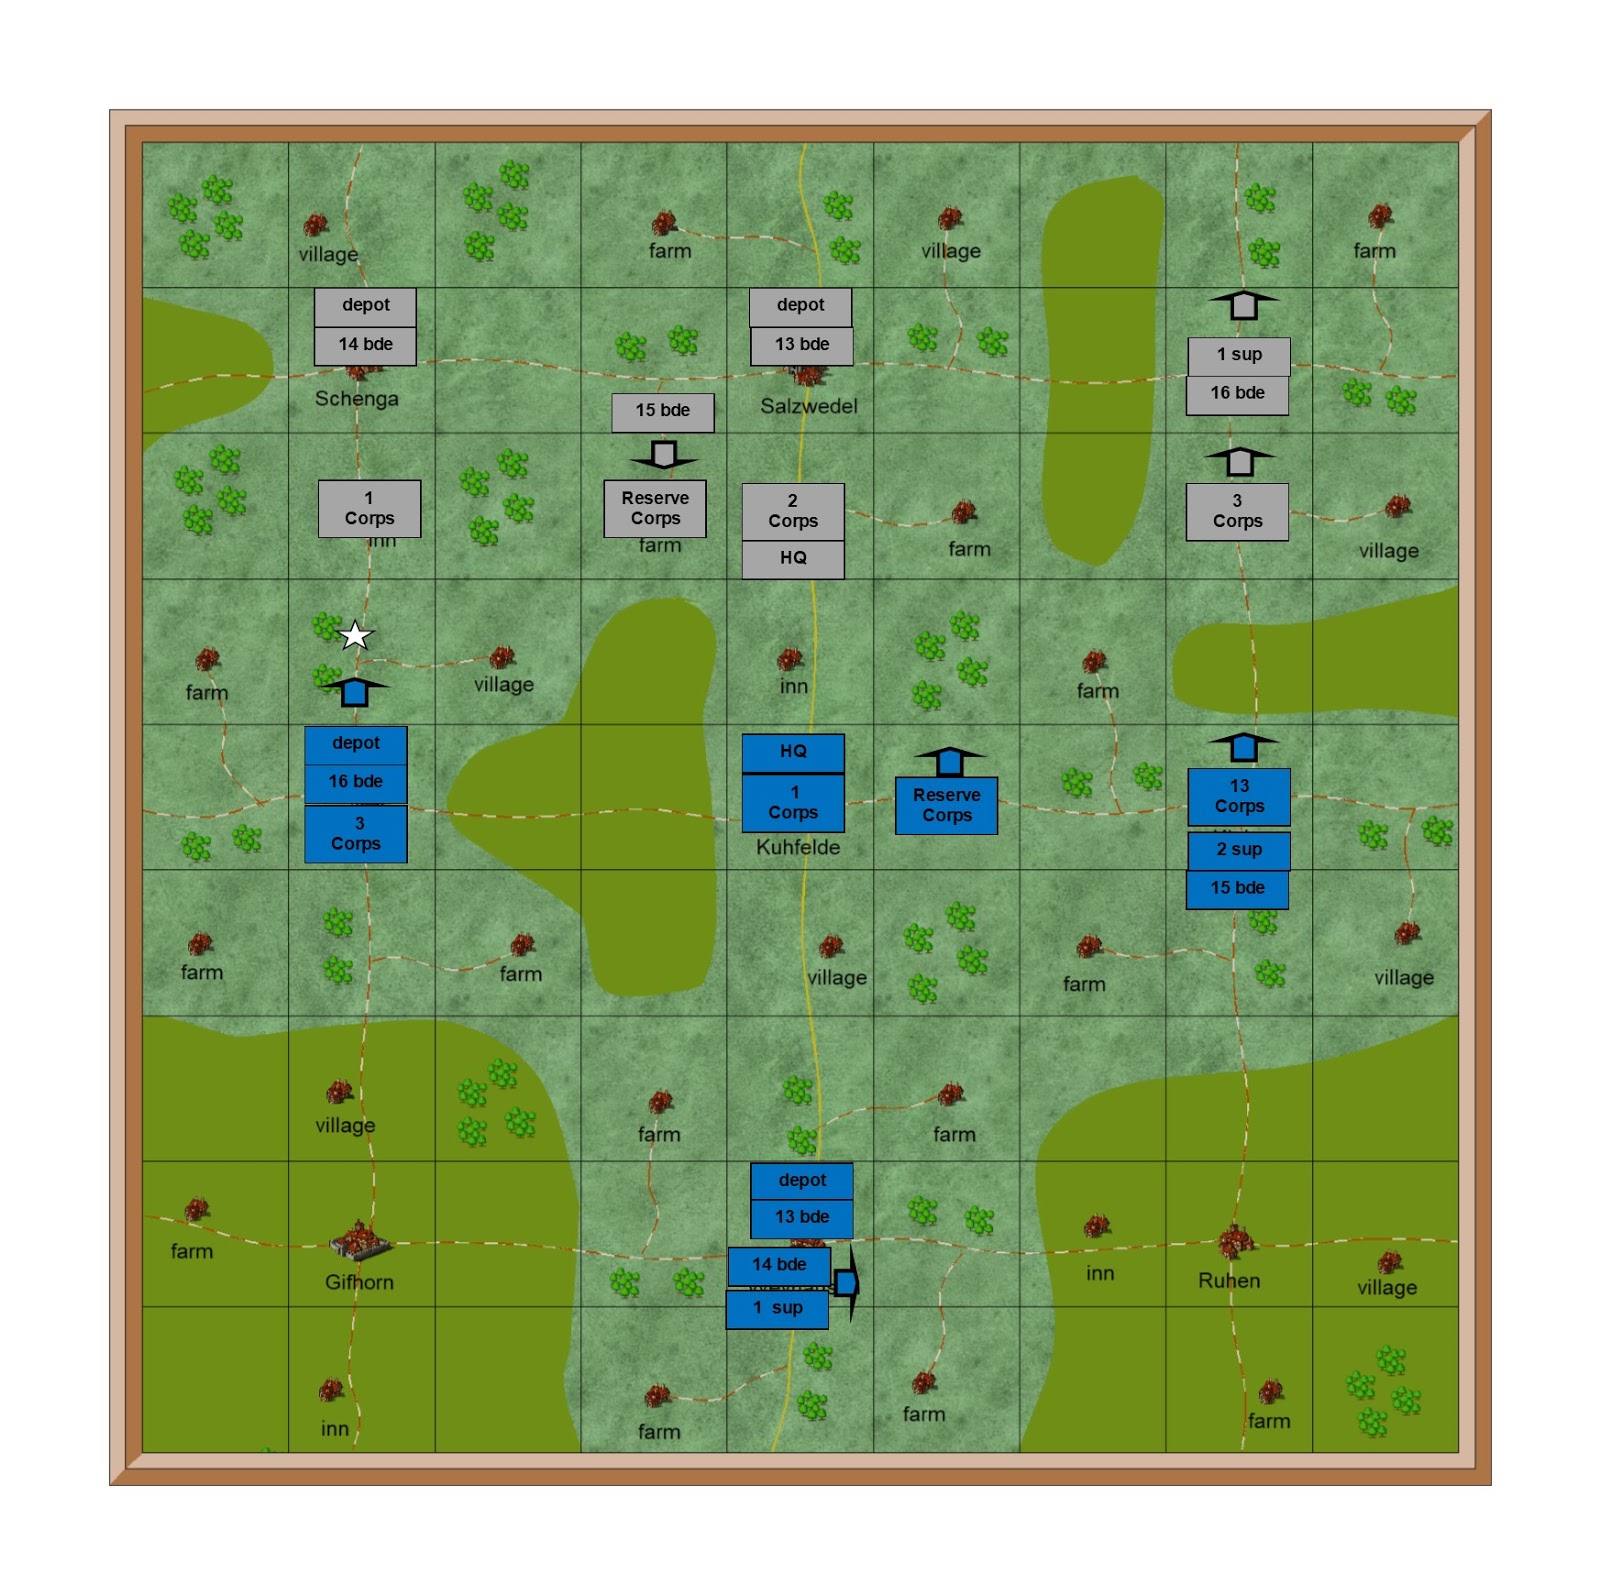
Campaign Map on 25 September 1813
After three battles, and two
defeats, in three days the Prussian army is in urgent need of resupply and
reorganisation. Blucher orders them to
concentrate at Salzwedel to carry out that regrouping.
The French army is also in
some disorder. However they have
suffered less casualties than the Prussians and are more capable of further
operations. In addition Napoleon is determined
to keep up the pressure on Blucher and prevent him from recovering from his
recent defeats.
3rd French corps is
best placed to carry on the offensive.
Two of their four infantry brigades each have 10% casualties, but their
cavalry have 20% casualties
1st Prussian corps
is in much worse condition. Two of
their infantry brigades also have 10% casualties, but a third has 50% and is no
longer operational. Their artillery and
cavalry also have 10% casualties.
Napoleon orders 3rd
corps to attack Schenga.

Battle of Schenga – end of move 5
The battle starts well for the
French, but by move six they have been soundly beaten and are in retreat.
Campaign Notes
By this stage of the campaign both
armies have fought and suffered casualties.
Given the opportunity to break contact and regroup, each corps can
transfer infantry casualties to their weakest brigade. But they must leave 10% casualties in the
original brigade. Each day they
receive battle casualty replacements at the rate of 10% of a brigade to each
corps. The priority for these
reinforcements is always gunners, cavalrymen and then infantry.
Even when a corps has received all
of the battle replacements it is entitled to, those brigades which have
suffered casualties will still have 10%.
This reduces their combat efficiency but even more importantly their
morale. Each will lose 1 on each dice
throw to test morale.
This battle opened well for the
French. They has more, and better,
infantry than the Prussians. So their
plan was to attack in two infantry columns.
Their cavalry was weaker than the Prussian, so they would support the
infantry from behind.
At the end of move 4 (1200 noon)
all four brigades were in position to attack.
All four would ignore the walled farm and Prussian infantry on the
right. They would concentrate on the
artillery and single infantry brigade supporting them. They had already
inflicted 10% casualties on this brigade.
The next move was critical. The French infantry would have to move into
close artillery range to attack the gunners and supporting infantry. If the Prussians moved first, their
artillery would have to fire at long range.
The French moved first. The artillery fired and hit the infantry
supporting the Prussian artillery. They
passed their morale test with a roll of 5. The infantry moved forward and were now
within charge move of the gunners and the supporting infantry.
The Prussians move second. The commander must decide whether to
withdraw his artillery from the infantry, or to fire at close range and hope to
rout them. He fired at point blank
range on the nearest brigade and caused 10% casualties. There was a good chance that this brigade
could withstand these casualties, because they were B class and this was their
first casualties. They rolled a dice
and got 1, they lost their morale and routed.
The infantry brigade on their right tested their morale for the rout,
rolled 2 and were shaken. The gunners
on their left also tested their morale, rolled 1 and were also shaken.
Brigades which are shaken cannot
fire or fight. They must pass a morale
test before they can do so. The French
right flank was paralysed. The two
brigades on their left flank each had 10% casualties and could not attack on
their own. The French must retreat
immediately.
But to do so they must move first
on 6
The Prussians moved first.
Their left hand brigade charged the
shaken French brigade, who broke and ran
The French moved second
Two brigades were already in rout,
the gunners were shaken
The French commander ordered a general
retreat
The broken corps retreated in some
disorder, covered by their weak cavalry brigade.
This was a very good example of how
fragile a corps can become in the later stages of a campaign phase. Even though the enemy may have more
casualties, the first brigade to test morale can easily cause havoc. In these circumstances it becomes of
critical importance which side moves first.
I played the French commander in
this game, and Jan the Prussian commander.
Although I was soundly beaten, and largely due to a run of very poor
dice, I really enjoyed the game. And a
Prussian victory at this stage was good for the campaign, as it would allow
Blucher a little breathing space to regroup.
No comments:
Post a Comment
I have set the settings for comments to come to me before posting so that I will not miss any