Sunday, 28 August 2022

Kufstein Campaign Day 6


26 May 1813 - Southern Germany - Day 6

Massena continues to fight to hold Obersdorf, Kufstein and Worgl

7th army fight to defend Obersdorf

8th army deploy east of Kufstein

9th army redeploy around Worgl


Schwarzenberg orders an attack on Obersdorf

1st army attack Obersdorf

2nd army regroup at Sankt Johann

3rd army retreat to Kitzbuhel


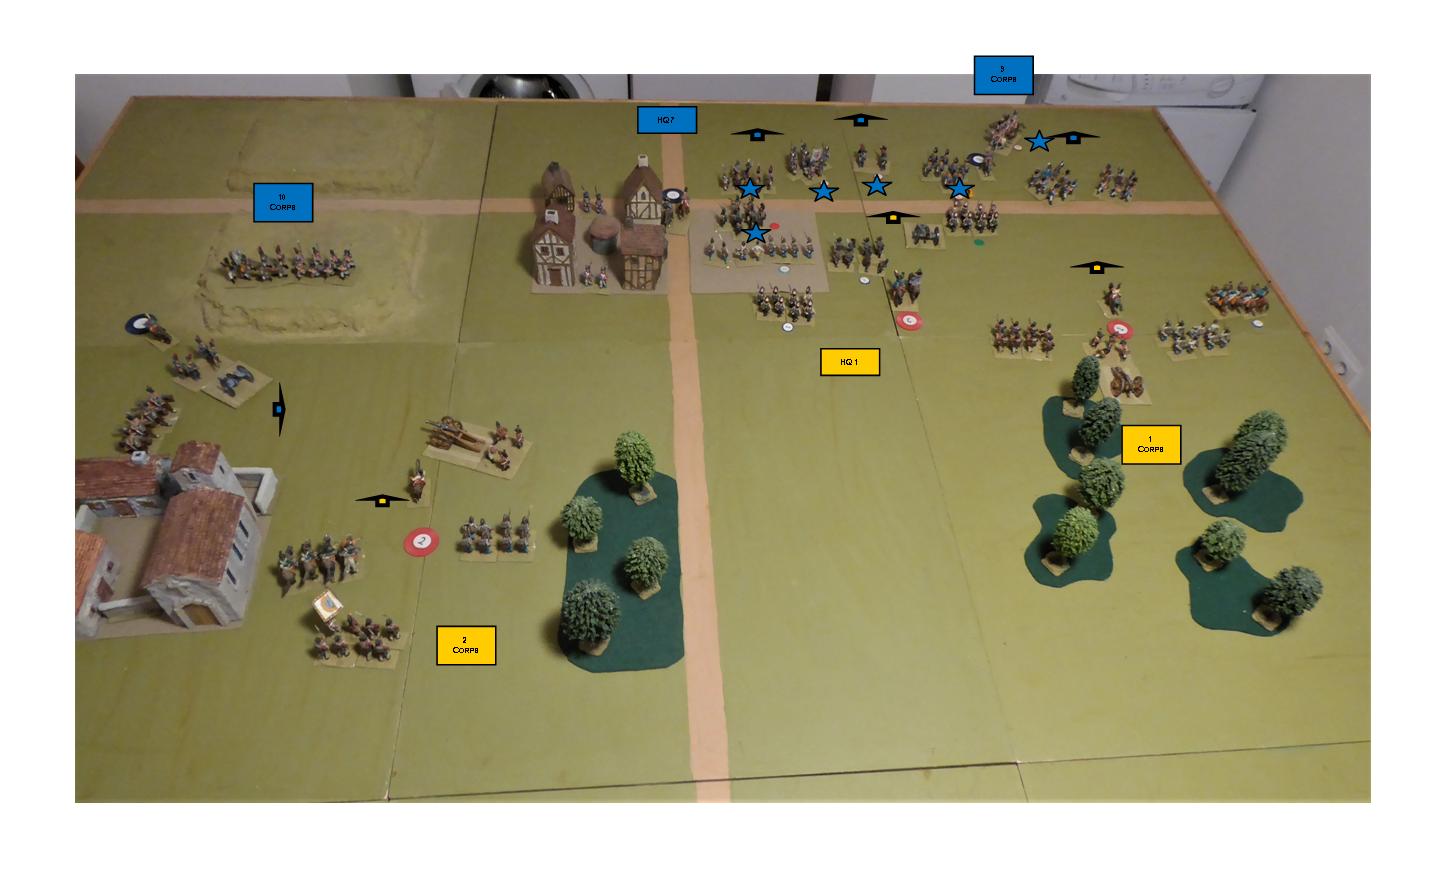
Battle of Obersdorf

Both armies started the battle with moderate casualties from earlier battles

This results in brittle morale, and makes them more likely to fail morale test and rout


After just 8 moves (out of 12) the whole Bavarian army is in retreat towards the town

The Austrians pursue, but are unable to catch up with them


At nightfall the Bavarians still hole Obersdorf, and can claim victory


Casualties have been very light on both sides

Bavarians lose 1 infantry, 2 cavalry and 1 gunner casualties (700 men)

Austrians lose 2 cavalry casualty (200 men)

3 Bavarian brigades in rout, 1 Austrian brigade in rout

Comment

I recently made a decision to fight battles for towns in front of the town, rather than in it

This was to avoid having to storm built up areas in every wargame

However the unanticipated result is much faster wargames, because both sides start the battle in the open

Much less opportunity for artillery to play a role, and much more likely to have early (and decisive) cavalry melee

This is particularly so when both armies start the game with casualties and brittle morale


In this particular game the initial cavalry melee went to the defending Bavarian cavalry

This should have resulted in the collapse of the Austrian attack.

However the Austrian cavalry rallied (needed and got 5 with 1D6)

Their artillery were also effective and they continued the attack


The Austrians soon bogged down in the centre, but success on both flanks overcame this problem


On the opposite flank the Bavarians deployed behind a fortified farm house, safe from artillery fire

But they lost the cavalry melee, and the winning Austrian cavalry pinned the infantry in square


After just 6 moves (out of 12) the Bavarian commander (Jan) started to withdraw to the town

They moved so fast that the Austrians were unable to catch them

So at nightfall the Bavarians held the town

This made them winners of the battle


However they will not be able to withstand a second day of battle

They have lost both cavalry brigades and one infantry brigade

Their gunners have suffered casualties, making them less effective


If the Austrians can attack again tomorrow the Bavarians will be forced to retreat and abandon the town

The only thing that can save 7th Bavarian army is the supply situation of 1st Austrian army

Without checking the campaign stats I honestly don’t know what that is

So, like me, you will have to wait for next blog post to find the outcome

Sunday, 21 August 2022

Kufstein Campaign Day 5


25 May 1813 - Southern Germany - Day 5

Marshal Massena prepares to defend Obersdorf, Kufstein and Worgl.

7th army deploys east of Obersdorf

8th army retreats to Kufstein

9th army battle of Worgl


General Schwarzenberg continues to attack

1st army prepare to attack Obersdorf

2nd army occupy Sankt Johann

3rd army attacks Worgl

Battle of Worgl

Both armies lost heavy casualties during this hard fought battle

The French moved forward to attack, rather than wait for the Austrians to do so

The Austrians held their ground, and repulsed the French]

However they lost too many casualties to then attack the fortified town


French lose 9 infantry, 7 cavalry and 1 gunner casualties (4400 men)

Austrians lose 10 infantry and 5 cavalry casualties (4500 men)

Comment

For some time our wargames have involved the defending side deploying either side of the town, with the commander taking a couple of elite brigades from each corps to reinforce the town.   The attacking army would also create an elite attack force in the middle, often including the artillery from at least one of the corps, and would attack the town.

This was driven by the campaign supply rules.  This required each corps to stay within supply distance of its main supply town.   This was usually the one behind the town being attacked.  To build up the forward towns as the main supply base risked losing everything if they lost the battle.

However the result was really a wargame consisting of a short siege followed by the storm of the town.   This game was a deliberate attempt to move away from this model.

Worgl is one of the three most westerly towns in the campaign, so there was not a town further east to become the main supply base for 3rd army.   It is also just one days march south of Kufstein, which is the main supply base for the whole French army of central Europe.   So the defending French army could be deployed in front of Worgl, and one of the two corps would still be within one day’s march of Kufstein.

You will see from photo 2 above how this looked on the wargames table.   The French are deployed in the three centre squares.   Worgl is behind the centre of the French position, and is held by two militia brigades.   The Austrians started the game off table at the bottom of the photo, but entered the table at the start of move one.

Jan (who commanded the French army) decided to attack the Austrians as they entered the t able.   This was not in my original plan, but it did add an interesting edge to the game.   The result was a very hard fought battle, and one in which neither side could use their artillery effectively.   This photo is taken at the end of move two, and already a cavalry melee has been fought.   This is because both armies are moving towards each other.

The result was a short, but very hard fought, wargame.   It finished at the end of move 8 (out of a possible 12 moves.  By then most brigades of both brigades were in rout, or very close to doing so.   This is partly because they all started the game with casualties from earlier battles, but also because there was a lot of close combat fighting very early in the game.

I enjoyed it, and it has prompted me to consider changing the orders of battle.   At present there are two corps in each army, who deploy across three scenic squares on the table.  This was done to create a lot of space to manoeuvre.  But it resulted in both armies having to create a “reserve” under command of the CinC.  I am looking at the option of increasing to three the number of corps in each army.  This would allow one corps to deploy in each of the three scenic squares.  It would also allow the commander to create a real reserve to reinforce any breakthrough or concentrate elite troops to create the breakthrough.   This is all at the planning stage at present, but is looking very likely.   It is likely to be introduced for the next campaign phase to see how it works on the table.

Sunday, 14 August 2022

Kufstein Campaign Day 4


24 May 1813 - Southern Germany - Day 4

Marshal Massena moves to support Sankt Johann

7th army retreat to Oberaudorf

8th army attacked at Sankt Johann

9th army deploys in front of Worgl


General Schwarzenberg continues to attack

1st army occupied Walchsee

2nd army attacks Sankt Johann

3rd army redeploys to attack Worgl

Move 4 - Austrians prepare to attack

Austrians take Sankt Johann and rout three brigades defending town

Baden corps (left) is broken and routed

Bavarian corps (right) hold hill but fail to support garrison

Bavarians lose 5 infantry, 2 cavalry and 1 gunner casualties (2300 men)

Austrians lose 2 infantry and 2 cavalry casualties (1000 men)


Comment

This game was interesting because Sankt Johann is a walled town.

This makes it particularly difficult to storm, unless the garrison is weakened first.


The Bavarian commander (Jan) had taken command of the town, and reinforced the militia garrison with two elite infantry brigades.   This would be a very difficult nut to crack.


The Austrian commander (me) created a reserve of two elite grenadier brigades in the centre.

3rd corps would attack on the right, 4th corps on the left.   The reserve would support whichever one had the most success.

Move 12 – end of game

3rd corps (on the right) lost the opening cavalry melee and had to be content with pining 11th Bavarian corps.   4th corps (on the left) won their cavalry melee and went on to rout 12th Baden corps.

At the end of move 9 the artillery of both Austrian corps deployed within close range of the town and opened fire on the garrison.   At the same time the reserve infantry closed to skirmish with the garrison.   The militia brigade (left half of town) were soon shaken, and then routed by the Austrian grenadiers.   The elite brigade (right half of town) held out until the end of move 11.   They suffered 20% casualties and were being replaced by the third brigade, when the second Austrian grenadier brigade stormed and routed them both.

Even at close range it requires a total of 6 with 2D6 to cause 10% casualties to the garrison.   Infantry require 6 to cause the same casualties by skirmish fire, and they can only fire alternative rounds (they lose minus 1 for firing last turn).   So I was surprised that I was able to take the walled town.  I expected a draw, with the Bavarians holding the town but having suffered heavy casualties and having to retreat. 

Another interesting game, and the campaign is going very well for the Austrians.

Sunday, 7 August 2022

Kufstein Campaign Day 3


23 May 1813 - Southern Germany - Day 3


Marshal Massena is determined to hold the Kufstein/Salzburg border

7th army to hold Walchsee

8th army to hold Sankt Johann

9th army to rally at Worgl


General Schwarzenberg wants to follow up his victory at Kitzbuhel

He also orders reserve depots to forward all available supplies to forward depots

1st army to attack Walchsee

2nd army hold Inzell

3rd army occupy Kitzbuhel

Battle of Walchsee

Austrians win the battle of Walchsee

At nightfall the Bavarians hold half of the town, but have six brigades in rout

During darkness they retreat and abandon the town

Bavarians lose 8 infantry, 2 cavalry and 1 gunner casualties (3500 men)

Austrians lose 3 infantry and 1 cavalry casualties (1300 men)


Comment

The battle was much closer than the casualties and final outcome would suggest.


The Austrians lost the first attack on the town, which was held by a militia brigade

Due to a poor dice throw, the attacking Grenadier brigade retreated shaken

Fortunately there were two reserve brigades, and they took half of the town on the second attempt


The Austrians also lost the first cavalry melee, but rallied and routed half of the Bavarian army


We fought this game twice, which is really very unusual

I always feel that it is important to accept the outcome of the table game

However in the first attempt the Austrians lost so heavily that it would have been the end of the campaign

This was entirely due to poor dice for the Austrians, and very good dice for the Bavarians

The result was almost all of 1st Austrian army were routed with heavy casualties


After just three campaign days, and two battles, the Austrians would have been reduced to two armies

It would have been impossible for them to attack the three Bavarian armies


Had it been a PBEM campaign, we would have felt obliged to accept the result

But because it is a solo campaign we both agreed to refight the battle

In doing so we salvaged the whole campaign phase.

But I do feel a little guilty to have compromised to do so

Sunday, 31 July 2022

Kufstein Campaign Day 2


22 May 1813 - Southern Germany - Day 2

Marshal Massena orders the Bavarian army to advance towards the border.   His intention is to defend Walchsee, Sankt and Johann and Kitzbuhel and not to cross the border and attack the Austrian army.

General Schwarzenberg orders the Austrian army to halt on the border and resupply.   However he orders 3rd army, south of the river Inn, to cross the border and attack Kitzbuhel.  

Battle of Kitzbuhel

Both armies start the battle at full strength

The French have 9 infantry, 2 cavalry and 2 artillery brigades

The Austrians have 8 infantry, 2 cavalry and 2 artillery brigades


Marshal Victor takes the best infantry brigade from each corps to support the garrison

17th and 18th corps are ordered to move forward to support the town


General Merveldt takes the two best infantry brigades from each corps to form the attack force

This leaves 5th and 6th corps weaker than their opposing French corps

Their orders are to contain the enemy, but not to attack

It is his intention to take the town with his strong reserve of four infantry brigades


The Austrians win the battle of Kitzbuhel.

French suffer 9 infantry, 1 cavalry and 1 artillery casualties (3800 men)

Austrians suffer 3 infantry and 1 cavalry casualties (1300 men)


Comment

The Austrians open the campaign with an attack on Kitzbuhel, south of the river Inn

If they win they hope to cause the French to retreat from their battle line along the border


Both armies are full strength, but the French also have a conscript brigade as garrison of Kitzbuhel

However both French corps are still in their peace time locations, four hours west of the town

This is so that they can receive supplies from the three western towns


The Austrian plan is to attack the town with the four best infantry brigades in the army

The two corps will then be outnumbered and will attempt to pin, but not attack, the French


5th Austrian corps (north of the town) deploy with their artillery at short range from the town

The French cavalry advance to attack the guns, but are driven off by the Austrian hussars

The Austrian guns cause 30% casualties causing the French to commit their reserve brigade

The Austrian infantry take the northern half of the town and rout both French brigades

All four Austrian brigades then attack and take the southern half of the town


The terrain south of the town makes it impossible for 6th corps to deploy at close range of the town.

They exchange fire with 18th French corps, but neither side do much damage


The French played a very defensive game, and paid the consequences.   Both corps were stronger than the Austrian corps opposite.  But neither took advantage and attacked.  In the north this was due to the loss of their cavalry early in the game.   In the south it was due to difficult terrain

The French were outnumbered in the centre, and worse still half of the Austrian artillery were allowed to deploy within close range of the garrison.

The advantage always lies with the attacker.   The defender must deploy first, and the attacker can then concentrate to attack the weakest part of the defence.  

Despite this the attacker must gain an advantage, particularly to attack a strong garrison.   This usually puts him at a disadvantage, for example 5th Austrian corps outnumbered by 17th French corps.  But the defender must counter this early in the game.  This is why the French sent forward their cavalry.  But having lost the melee, even though the cavalry did rally later in the game, they were unable to send forward their stronger infantry to attack 5th Austrian corps.

This was disappointing start to the campaign for the French.  However the Austrians needed an early victory to push the French back from their strong defensive positions on the border.

Wednesday, 27 July 2022

Kufstein Campaign Day 1


21 May 1813 - Southern Germany - Day 1     


The Austrian army advance to the Kufstein/Salzburg border

This brings them within attack distance of Walchsee, Sankt Johann and Kitzbuhel

However it takes out of supply range of their depots at Mattsee, Salzburg and Kuchl

All three towns forward supplies to the forward depots at Nussdorf, Inzelll and Schonau 


The Bavarian army is surprised by this movement and remain in their peace time locations.  This keeps them within supply range of all six depots

Comment

To receive supplies a corps must be formed (no brigades routed), stationary, not in contact with the enemy (at least one map square between them) and within one days march (three squares) of a depot.

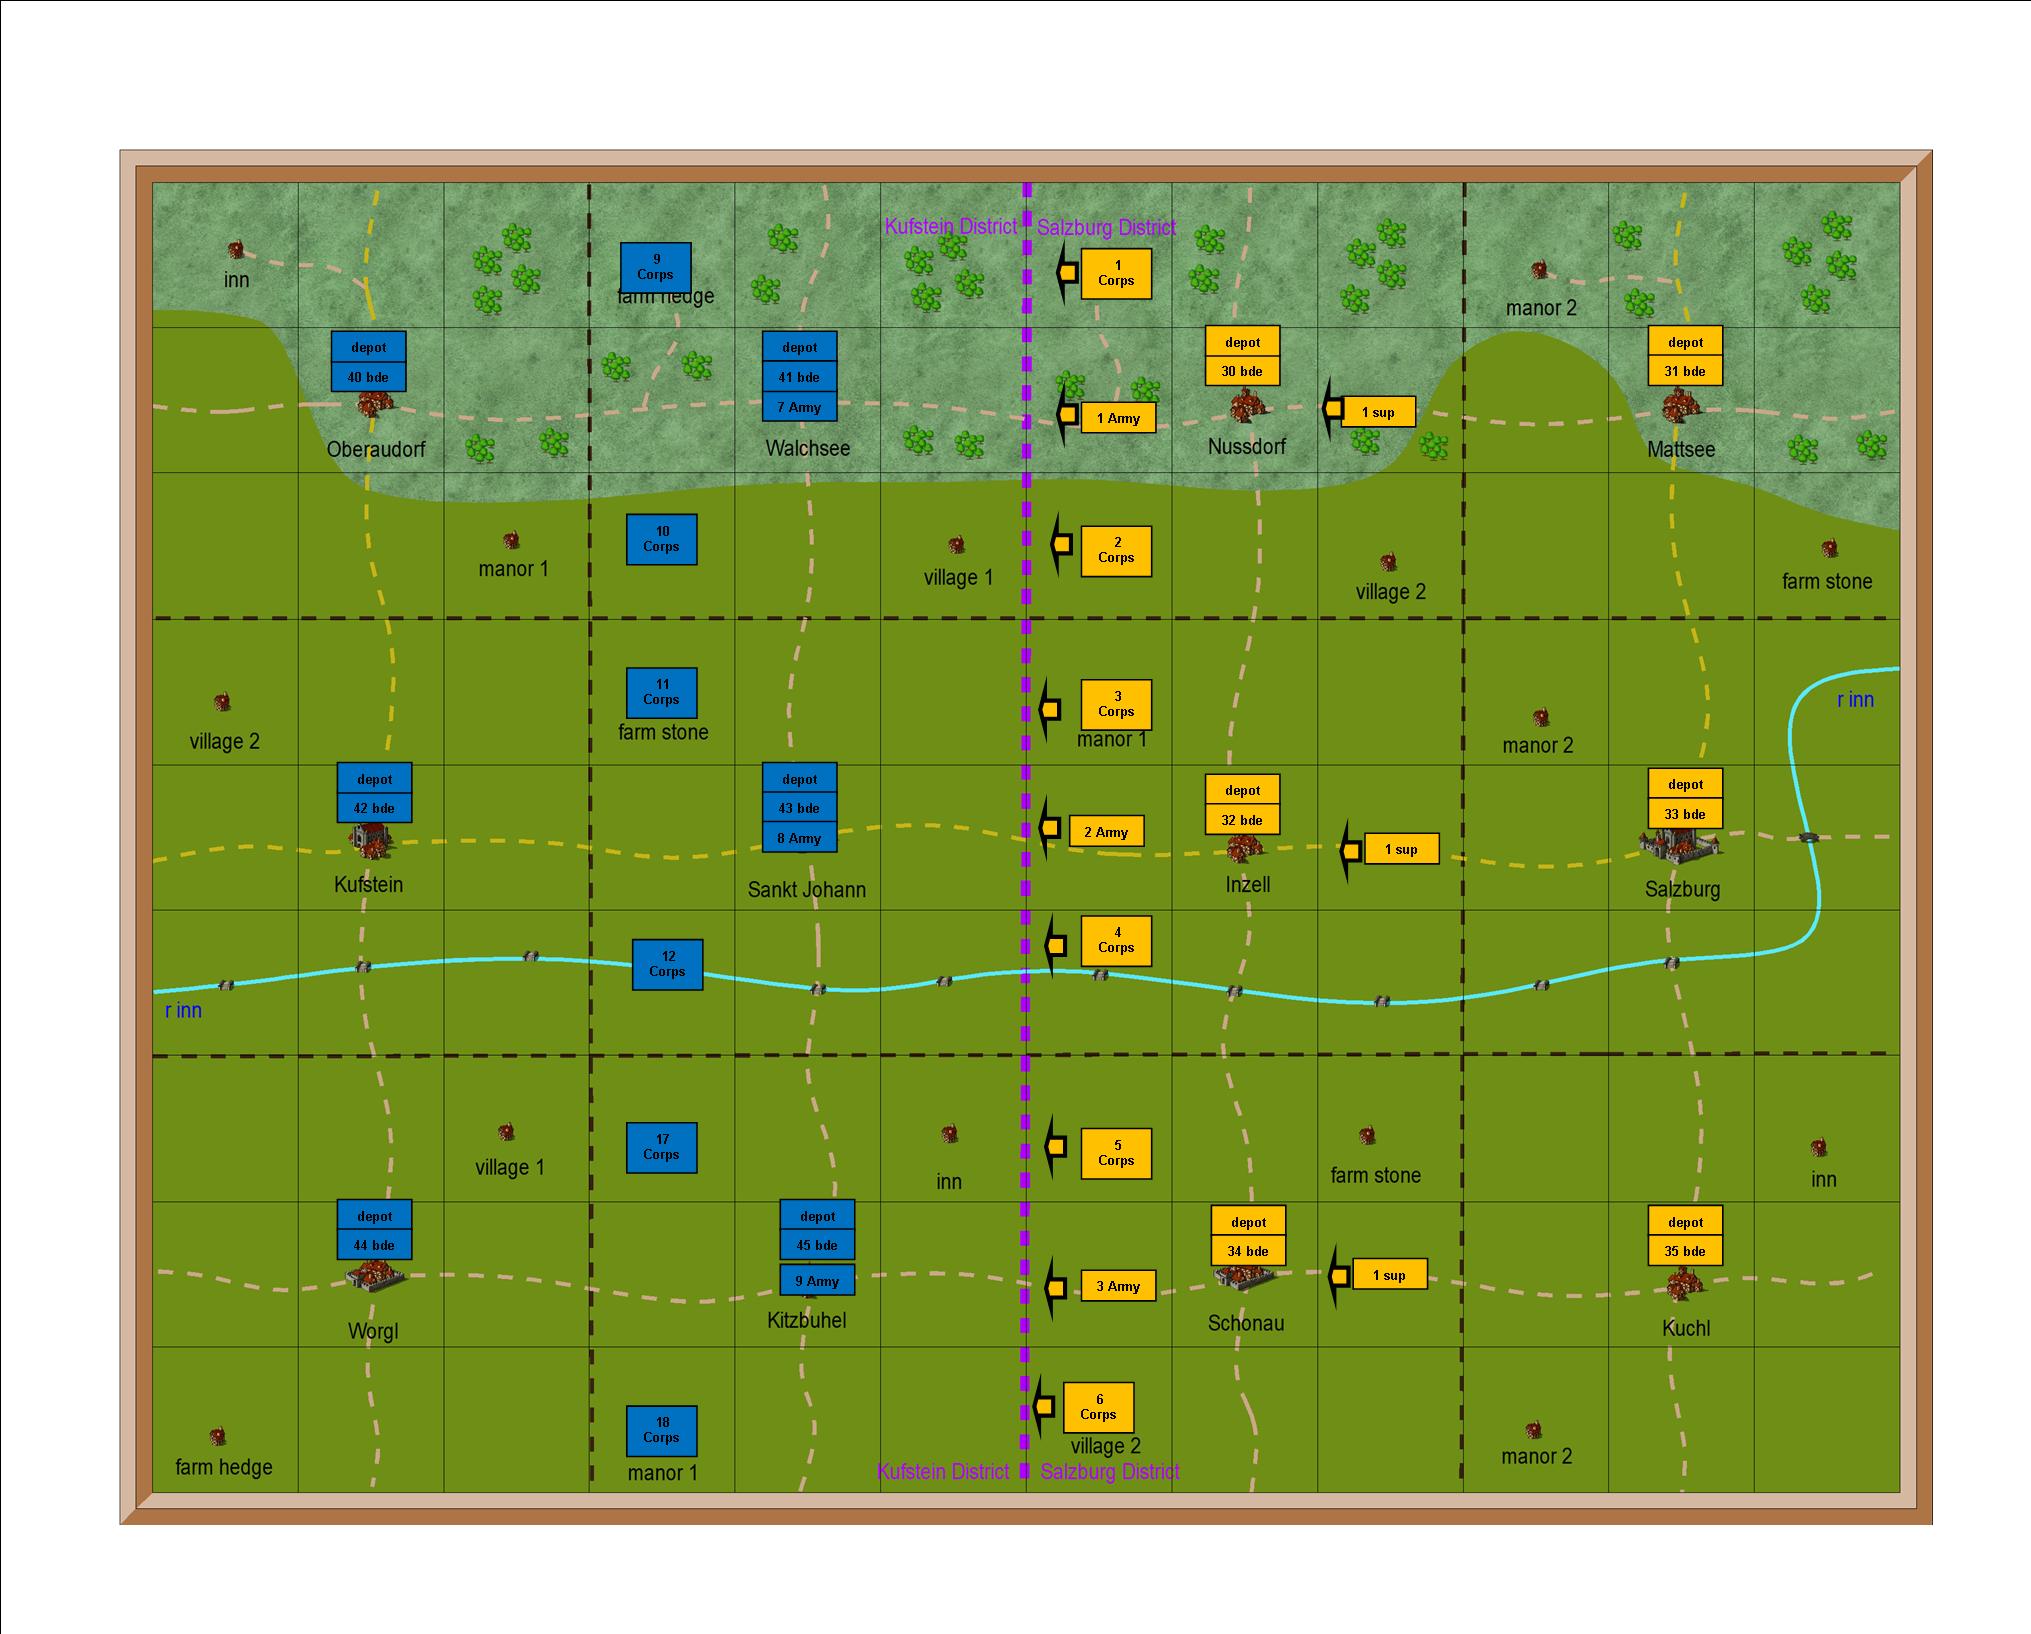
On the map all six Bavarian corps are able to receive supplies from the six depots in Kustein District.

By moving up to the border all six Austrian corps are out of range of the three eastern towns in Salzburg district.   However they can move supplies to the three forward towns.   They are allowed three convoys per day, and each convoy can take up to four days supplies.

If a corps runs out of supplies it cannot attack the enemy, but it can defend itself.   It will lose 10% of one brigade each day that it remains out of supply, that is 400 infantry or 100 cavalry or gunner.   The corps commander can decide which brigade will lose these men.

Each depot collects one day’s supplies each day that it is not under attack.

Each army has a minimum of 30 days supplies.   This is normally four with each corps, and one with each depot.   If a town/depot is captured by the enemy they take possession of all it s current supplies.   This may bring their total to more than 30 days.   The side which loses the depot will receive their supplies at their main depot, in order to maintain the minimum of 30 days.  

Sunday, 24 July 2022

Start of Kufstein Campaign


Southern Germany

The next campaign phase takes us to southern Germany with the colourful uniforms of the Austrian and Bavarian armies.  The light blue of the Bavarian infantry, and the white and blue of the Austrian Hungarian infantry are amongst my favourites.

Start of Campaign

Kufstein district is right in the middle of the Tyrol area of southern Germany, between Innsbruck and Salzburg.   Obviously a very hill terrain, and not particularly well suited to Napoleonic battles.  

When I first considered this campaign phase I played around with the idea of including guerrilla bands of Andreas Hofer style irregulars.  I do not have any suitable figures, but the irregular combat would not be included on the wargames table.  And when a garrison was required I could use Spanish guerrillas.    But he was shot by the Austrians in 1810 and the Tyrol became part of Bavaria.  

I am never sure whether to make the field armies responsible for the garrison of towns and depots, or whether to have a reserve army charged with this task.   If the field army is responsible it makes them weaker as they take new towns, but it reduces the size of corps on the wargames table.   In this campaign I have compromised by giving both sides a reserve corps of six brigades.   That is sufficient to provide garrisons on their own side of the border.  But if they capture a town from the enemy they will have to provide a garrison from the field army

The Austrian campaign objective is to take and hold Kufstein (centre far left).   So they will have the initiative and the campaign will start when they cross into Kufstein district.

The Bavarian objective is to hold all of Kufstein district.

Lots of hilly terrain making movement and deployment difficult, especially for the attacking Austrians.   And the river Inn cuts communication between both armies.

Looking forward to this campaign.