Sunday 24 April 2022

Start of Llanes Campaign


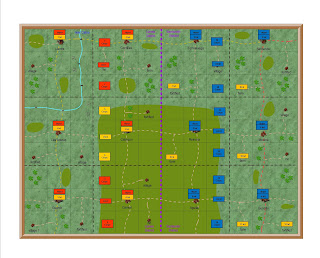
Traditional map of Europe


My 1813 campaign started in April 2009.  

Since then it has provided 82 campaign phases and 418 battles to wargame.


The campaign was created to provide interesting battles to wargame.

It was never my intention to model the actual 1813 campaign.

I choose 1813 because it was the first campaign in which all of the major nations fought at the same time

It was also notable because all of them were of relatively equal fighting and command ability

In previous campaigns the French had usually defeated their opponent

But by 1813 those defeated nations had learned hard lessons and improved their own armies

In the previous year Napoleon has lost an entire army in Russia

In 1813 they were largely replaced by conscripts


It was always designed to be a series of campaign phases.

Each one would be similar in size and duration to the Waterloo campaign

Each would also be free standing, and would start with both armies at full strength

It was planned that each phase would provide about 6 battles to wargame


The campaign order of battle was based on my existing model soldier collection

I had armies for Austria, Britain, Prussia, Russia and Spain

I also had a much larger French army, which included many allies such as Polish, Italian, Westphalian and Bavarian


The campaign was divided into five theatres, three in Germany and two in Spain.

Austria, Prussia and Russian would be in Germany, each with a French army against them

Britain and Spain would operate in Spain, again with a French army against each.

The orders of battle would remain constant for the five theatres

This would allow me to use all of my model soldier collection in sequence.


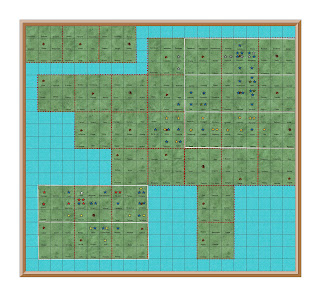
New Military District map of Europe showing each campaign phase


The campaign has run nonstop since April 2009

However it has not followed an 1813 narrative

Had it done so it would long since run out of options.


There have been six major reorganisation of the campaign

The original was April 2009 and was a solo campaign

Second was October 2009 when I started the first PBEM campaign

Third was June 2013 when the campaign reached 2014 and it entered France

Fourth was February 2015 when I reset the calendar to January 2013

Fifth was February 2016 when I changed back to solo campaign

Sixth was June 2020 when I made new maps based on military districts


There have been relatively few changes to either the campaign or wargame rules

The campaign rules were changed when the campaign went from solo to PBEM and back to solo

The wargame rules had minor changes to reflect game play

However throughout the period there was always a game on the table from the current campaign

Llanes Campaign Phase


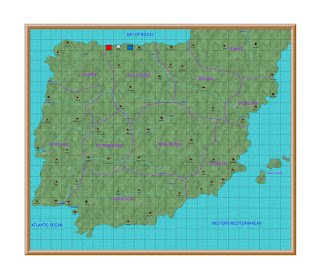
This will be the fifteenth campaign phase between Wellington and Soult in northern Spain.   

The British won 8 and the French 7.


In this campaign Wellington commands four Anglo-Portuguese and two Spanish corps

He can also rely on 12 Spanish militia brigades

They are the garrisons of the towns in the campaign

When a town is taken by the French the garrison becomes a guerrilla brigade


The French also have six corps, plus six conscript brigades for garrison duty


The major difference in this campaign is the fighting ability of the two Spanish corps.   

They are not up to the standard of the four British corps

But are similar to the Portuguese infantry brigades in each of those corps

To is to reflect that in 1813 Wellington’s army included Spanish brigades

These performed relatively well, especially compared with those commanded by Spanish generals.


It is always difficult to get the balance right between French-British-Portuguese-Spanish brigades

Particularly when games are mostly decided by the luck of the dice.

But I wanted to get away from Spanish running away at the first sight of the French

This was certainly not true in 1813, when they formed an important part of Wellington’s army
Sunday 17 April 2022

Morale in Wargames


If you have a regular wargame opponent, as I am fortunate to have, morale will probably play an important role in your wargames.   When both of you have a good grasp of the rules, and a lot of experience of gaming together, it is often the thing which decides the outcome of the game.

When I started my 1813 campaign I decided that I would have to write my own rules, both for the campaign and the wargame.   I wanted the campaign to provide interesting battles for my wife and I to wargame.  And I wanted the wargame to be fun and fast moving, whilst still reflecting Napoleonic warfare.  It soon became apparent that the morale rules would be critical in both the campaign and the wargame.

To keep it simple I decided on 1 six sided dice to determine the outcome.   This would be amended as follows

Plus 1 for elite troops

Plus 1 if general in base contact

Plus 1 if supports within 4”

Plus 1 if garrison or in woods

Plus 1 if 20” or more from the enemy

Minus 1 if conscript (poor quality) troops

Minus 1 no general within 8”

Minus 1 no supports within 8”

Minus 1 for each casualty

Minus 1 for rout within 4”

Minus 1 if routed through

Minus 1 if disordered

Minus 1 if shaken

Minus 2 in rout


The total of the dice and the total plus or minus would decide what the brigade would d


3 or more pass morale test

1 or 2 shaken

0 or less rout


Most of the modifiers are not down to the player, but the result of casualties or current morale.    But the player can ensure that all brigades are within supporting distance (4”) of each other.   And that their general remains within 8”.

The overall effect is that most troops without casualties and with supports will make their morale.

After a battle all casualties are transferred to the campaign.   Infantry casualties can be concentrated in one brigade, but 10% always remain with the brigade who received them.  This applies for the remainder of the campaign.   So casualties in one battle have an effect until the campaign ends.

All casualties, less the 10%, can be replaced by reinforcements.   However they take a long time to arrive.   A corps must be stationary, not in contact with the enemy and be in supply to receive reinforcements.   They then receive 1 casualty per corps per move.   These are allocated in priority to artillery, cavalry and then infantry.

In addition in each corps all infantry casualties, less 10% per brigade, can be transferred to the brigade with most casualties.   This allows all other infantry brigades to quickly come to full strength, less the 10% casualties which will remain until the end of the campaign.

It sounds a little complicated, but it is really simple to apply in use.   After each campaign day is completed I adjust casualties to each corps.   When a battle is declared the current strength of each brigade is noted and shown on the wargames table by use of a small token which shows the casualties as numbers, with 1 representing 10%.

At the start of the campaign all brigades will be full strength.  So in their first battle all will follow orders until they start to receive casualties.   The more casualties they receive the more likely they are to fail a morale test.   It usually requires a poor dice throw, plus minus modifiers, for a brigade to rout.

When they do all supporting brigades (within 4”) must immediately test their morale.   If they rout, then all brigades within supporting distance of them must test morale.   This is when earlier battle casualties have an immediate effect on the current game.   All brigades with 10% casualties or more are more likely to join the rout.

For us this simple rule mechanism usually determines who wins the game.   Neither of us tend to make either rule or tactical mistakes.  We have used the rules so often that we have learned both very well.    So it is loss of morale, often sparked by a single casualty, which often results in a victory or defeat.

Simple morale rules like this will not appeal to everyone.   I have used many commercial rules over the past 50 years.   All had morale rules, some very complicated.    I remember that WRG rules had lengthy lists of modifiers, most of which cancelled each other out.   But they were impossible to remember and would require long periods of consultation during the game.

Our morale rules have served us well since they were written 14 years ago.   They have had many amendments in the light of play experience.  But having written the rules myself these changes rarely has unexpected consequences in later games.

Sunday 10 April 2022

Gera Campaign – Day 9


9 May 1813 – Central Germany – Day 9

In the north 5th French army attack Naumburg

2nd Russian army abandon the city and retreat east to Kretzschau


In the centre 4th French army occupy Jena

1st Russian army retreat to Jena


In the south 6th French army rally, regroup and resupply at Sulza

3rd Russian army rally at Lederhose


Both armies are both now low on supplies and in need of reinforcements

Neither are capable of renewing hostilities

The French have failed to take Gera

However they have finally forced the Russians to retreat from the border

It is a limited French victory, but still a victory.


Comment

After nine days the French have won the Gera campaign phase.

They have won four of the six battles fought


Despite this it has not been an easy or a clear cut victory for the French

They have failed to take their campaign objective, the town of Gera

Indeed they have been hard put to establish themselves in Gera District


Strange that the Russians never seem to do well in the campaign.

Out of 16 phases fought so far, they have only won three.

There is no obvious reason for this, they are similar quality to the French.

Their cavalry are weaker, having two Cossack brigades

But their artillery is stronger, having more 12 pounders than the French

So in theory the two should balance each other.


Looking forward to returning to Spain for the next phase

Sunday 3 April 2022

Gera Campaign – Day 8


8 May 1813 – Central Germany – Day 8

Both armies are desperately in need of rest, reorganisation and reinforcements

Supplies are also running low, though not yet likely to affect their operational ability

Davout is determined to secure his foothold in Gera district before this happens

He orders 4th French army to attack Jena

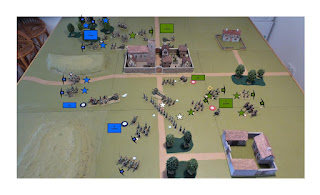
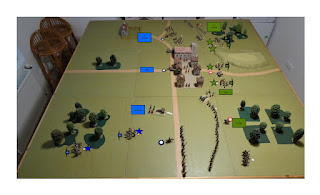
Battle of Jena

Both 4th French and 1st Russian armies have suffered least battle casualties

The French also have 2nd Young Guard corps, the elite of the Army of the Centre

So for once neither commander had to worry about battle casualties making their brigades weak


The Russians had two elite infantry brigades in support of Jena, under the command of the army commander

The French created an attack force of two elite brigades, commanded by Davout


The young guard were north of the town, with their artillery on their right to fire on the garrison

They would not advance until the town was under infantry attack


6th Vistula corps was south of the town.   Their artillery would also engage the garrison.

Their main task was to contain 1st Russian corps and prevent them supporting the town


The combined French artillery was ineffective against the garrison, despite moving to close range

It was left to the infantry to assault Jena


North of the town 2nd Russian corps, including the guard cuirassier brigade advanced to support the garrison

The young guard were forced to move their artillery to fire on the advancing Russian infantry

The guard grenadiers charged the Russian guard cavalry in the decisive engagement

The French cavalry won, and secured the left flank

However the Russian cavalry rallied and supported the infantry to hold the French


South of the town 1st Russian corps, including the guard Cossacks, also advanced to support the garrison

The Cossacks charged the Polish lancers, and routed them.

This unexpected setback caused the Vistula corps to halt their attack

However they did manage to hold the flank.


Fortunately the French infantry attack on Jena was a complete success

The two elite brigades routed the two Russian grenadier brigades who formed the garrison


At nightfall both armies were still in place, but the town was firmly held by the French


The Russians have lost 4 infantry, 3 cavalry and 2 artillery casualties (2100 men)

The French have lost 3 infantry and 3 cavalry casualties (1500 men)


Comment

For once morale due to earlier battle casualties was not a problem

Both sides had good quality troops, including elite guard cavalry


It was strange that the French artillery did not perform better.

They were able to manhandle the guns into close range of the garrison

So they only needed a total of 7 with 2D6 for a hit, yet only managed one hit out of 4 attempts


The cavalry melee proved critical, particularly the Cossack victory

This caused the Vistula corps to halt and abandon their attack

However the Russians failed to take full advantage and attack the Poles.


The young guard were also unimpressive.

The cavalry melee between the two elite brigades did result in a French victor

However the Russian cuirassiers rallied and helped prevent the French advance

This was largely because of the time it took to redeploy the French gunners


The deciding engagement was the infantry fight for the town.

Both sides had elite troops, so the advantage was with the Russian defenders

The one casualty caused by the French guns left one brigade shaken

Both brigades then withdrew into the centre of the town to seek shelter from the guns

This allowed the French infantry to assault on equal terms

It was then just luck which side would win

The French had better luck than the Russians


Another very interesting wargame, with many unexpected outcomes